 how-to
Signs of Poor Quality Paint Jobs: 2026 Inspection Guide
Table of Contents
- How to Tell If a Paint Job Is Bad: A Diagnostic Checklist
- 1. Drips, Sags, Runs, and Solvent Pop
- 2. Orange Peel Texture and How to Fix Orange Peel on Car Paint
- 3. Color Mismatch, Overspray, and Pigmentation Issues
- 4. Peeling, Cracking, Blistering, and Delamination
- 5. Brush Marks, Roller Stipple, and Surface Contaminants
- 6. How Long Does a Professional Paint Job Last?
- 7. Is a Mobile Car Paint Repair Service Worth the Cost?
- Frequently Asked Questions
Last Updated: September 10, 2026
How to Tell If a Paint Job Is Bad: A Diagnostic Checklist
Most owners discover poor quality paint jobs months later, when the finish starts failing. This guide from Rubio's Custom Repair inc breaks down the seven flaws that separate a durable finish from an expensive mistake.
A poor quality paint job is a finish that fails to bond, cure, or match correctly, showing defects like runs, orange peel, or peeling within the first year. Nearly all are visible in the first ten minutes if you know where to look.
The Touch Test and Lighting Techniques for Paint Inspection
Inspect in daylight, not indoors. Fluorescent shop lighting flattens texture and hides color shifts, so pull the vehicle outside and view each panel at a low angle.
Run your fingertips across the surface with light pressure. A properly cured topcoat feels uniformly smooth, like glass. A bad one telegraphs grit, ridges, or a tacky patch where the coating never fully cured.
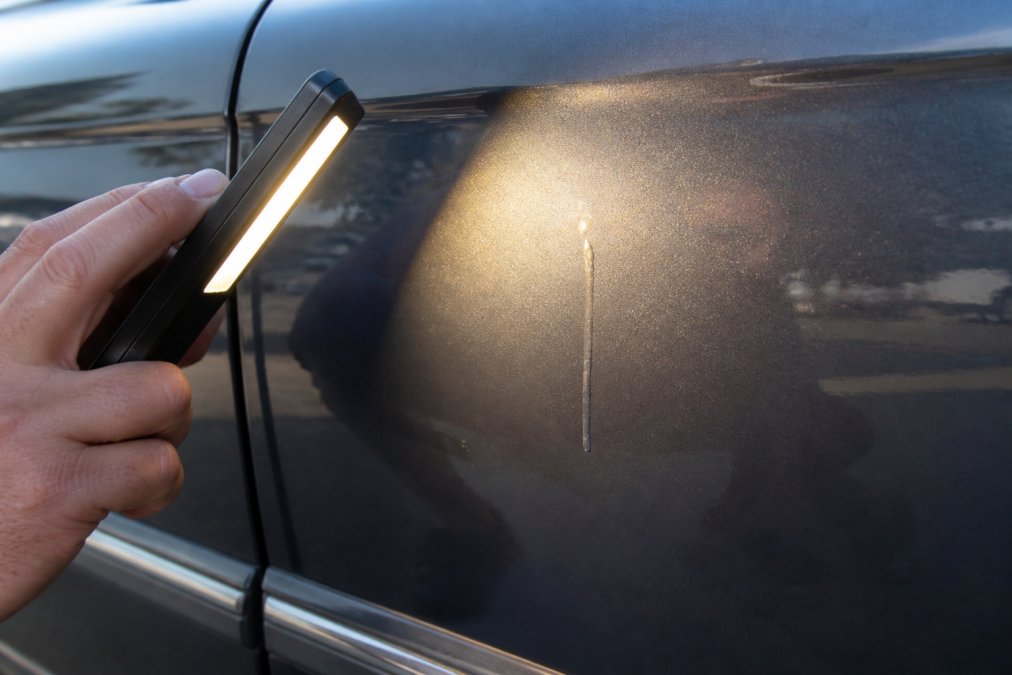
Then hold a bright handheld light parallel to the panel, roughly 15 to 20 centimeters away. This grazing angle reveals what straight-on viewing misses:
- Drips and sags that look flat under overhead light
- Orange peel texture that disappears in soft lighting
- Sanding scratches under the clear coat
- Overspray haze on adjacent panels
Check edges, door jambs, and areas around trim and badges, where shops cut corners and defects show up first.
1. Drips, Sags, Runs, and Solvent Pop
Drips, sags, and runs share one root cause: too much paint applied too fast. When a coat goes on heavier than the film can support, gravity pulls it downward before it cures.
A drip is a single teardrop of hardened paint; a sag is a wider curtain that slid down the panel; runs are the longest version, often along vertical surfaces and edges.
Solvent pop looks different: tiny pinholes or craters caused when solvent trapped under the topcoat escapes during curing. The fix requires sanding back to the base coat and recoating, which is why proper flash time matters.
2. Orange Peel Texture and How to Fix Orange Peel on Car Paint
Orange peel is a bumpy, dimpled texture in the clear coat resembling orange skin. It's one of the most common complaints, and one of the most misunderstood.
The cause is usually spray gun distance, air pressure, paint viscosity, and shop temperature. Paint that's too thick or applied too cool doesn't flow out and level before it sets; humidity and airflow matter too.
How to fix orange peel on car paint depends on severity. Light cases can be wet-sanded with fine grit and polished smooth. Heavy texture usually means the clear coat needs sanding and respraying, because there isn't enough film thickness to level it without cutting through.
Here's the honest part most guides skip: some factory finishes have a light texture straight from the assembly line. A little is normal. Heavy, uniform texture across a repaired panel is not.
3. Color Mismatch, Overspray, and Pigmentation Issues
Color mismatch is the defect owners notice first. Modern metallic and pearlescent pigments shift with viewing angle, so a panel can look perfect under shop lights and completely wrong in sunlight.
Proper color matching requires spraying test cards and checking them against the vehicle in natural light before committing to the full panel. Pigmentation problems also show up as blotchiness, where metallic flakes clump instead of laying evenly.
Overspray is separate: fine paint droplets that settle on unmasked panels. It feels like sandpaper, creates a dull haze along repair edges, and can bond permanently if left alone.
4. Peeling, Cracking, Blistering, and Delamination
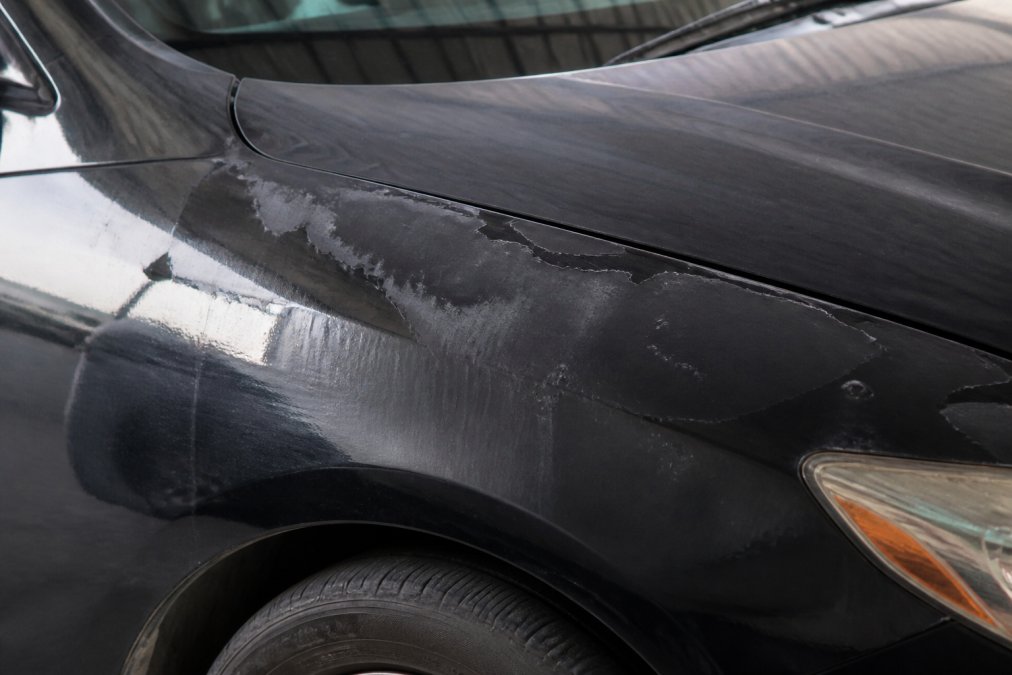
Peeling and delamination are structural failures, not cosmetic ones. When the base coat separates from the primer, or the clear coat lifts from the base, the repair has failed at the adhesion level, no polishing, waxing, or spot repair will bring it back.
The mechanism behind each failure
Paint bonds to a substrate through mechanical tooth (micro-scratches the primer grips) and chemical cross-linking. Break either and the film lets go.
- Peeling, the coating lifts in sheets or flakes, usually starting at an edge, seam, or chip. The cause is almost always a contaminated or unsanded substrate: wax, silicone, oil, or bare shiny metal the primer never bit into. Once moisture wicks under a lifted edge, the peel accelerates.
- Blistering, raised bubbles under the paint, often filled with trapped moisture or solvent. Two common sources: moisture in the shop's compressed air line sprayed into the base coat, or a substrate primed before it was fully dry. Blisters cluster and grow in heat.
- Cracking, fine spiderweb lines that deepen over time. Often the result of excessive film thickness (too many coats) or a coating applied over a flexible plastic bumper without a flex additive, so the paint cracks when the panel flexes.
- Delamination, clear coat separating from base coat, or base from primer. It shows as a milky or cloudy edge that lifts when you catch it with a fingernail. This is the clearest sign the shop skipped a step in the recoat window or applied incompatible products.
Cosmetic flaw vs. structural failure: how to tell them apart
| Defect | Likely Cause | Correction | DIY or Pro? |
|---|---|---|---|
| Peeling | Poor paint adhesion to substrate | Strip and respray panel | Pro, full panel refinish |
| Blistering | Moisture or contamination trapped | Sand back to bare metal | Pro, substrate must be redone |
| Cracking | Excessive film thickness or age | Sand, prime, recoat | Pro if widespread; DIY only for isolated spots |
| Delamination | Base coat and clear coat separation | Full panel refinish | Pro, no spot fix holds |
| Fisheyes / craters | Silicone or oil on substrate | Sand, clean, recoat | Pro, contamination source must be found |
A useful rule: if the defect is in the topcoat (a run, a sanding scratch, light orange peel), it can often be leveled or polished. If it's between layers (peeling, blistering, delamination), the bond is gone and the panel must go back to a sound substrate. Polishing a delaminating panel just hides the evidence for a few weeks.
The prep steps that prevent all four
Surface preparation is the deciding factor. A panel that wasn't sanded, cleaned, and primed correctly will fail no matter how good the topcoat looks on day one. A reputable shop's prep sequence:
- Wash and degrease the panel with a wax-and-grease remover.
- Sand to create mechanical tooth, typically 180-320 grit on bare metal, finer on existing paint.
- Treat bare metal with a self-etching or epoxy primer for corrosion resistance.
- Apply a primer surfacer and block-sand it flat.
- Wipe with a tack cloth immediately before topcoat.
- Seal edges, seams, and panel gaps that trap moisture.
If you can see sanding scratches under the finish, or the shop can't say what primer it used, the prep was rushed.
Documenting failure for a warranty claim
If a prior repair is already failing, the defect itself is your evidence. Photograph the affected area in raking light, note the repair date, and keep any written estimate or invoice. Most states require auto body shops to honor written warranties, and many consumer protection statutes cover defective workmanship (usa.gov). If the shop refuses to stand behind the repair, your state attorney general's office can guide you on filing a complaint.
5. Brush Marks, Roller Stipple, and Surface Contaminants
Brush strokes and roller marks belong to a different category of poor quality paint jobs: work done by hand rather than sprayed. They show up as visible ridges or a stippled pattern.
Stipple is the textured pattern a roller leaves behind, a clear sign the coating was applied without proper spray equipment, usually with uneven mil thickness.
Surface contaminants are the silent killer. Dust, oil, silicone residue, and wax left on the substrate prevent paint from bonding. A tack cloth pass before spraying is standard in any reputable shop; skipping it shows up later as fisheyes, craters, or localized peeling.
Sheen uniformity matters too. Look across the panel at an angle: a good finish reflects light evenly, while a bad one has dull patches where the clear coat was applied unevenly.
6. How Long Does a Professional Paint Job Last?
A professional paint job lasts 10 to 15 years or more with proper care, assuming correct surface preparation, quality materials, and a controlled curing environment. A rushed job with cheap materials can start fading or chalking within a year.
The curing process matters as much as the application. Paint needs time and the right temperature to cross-link fully; shops that push vehicles out before the coating cures are setting up a warranty claim.
To protect the finish:
- Wash every two to three weeks with a pH-neutral soap (aaa.com)
- Apply wax or a ceramic sealant twice a year (aaa.com)
- Park in shade or use a cover when possible
- Address chips and scratches early, before moisture reaches the substrate
Premature fading and chalking usually point to a thin clear coat or low-quality materials. Both are avoidable with the right shop.
7. Is a Mobile Car Paint Repair Service Worth the Cost?
A mobile car paint repair service is worth the cost for small, isolated defects like a single scratch, a scuffed bumper, or a stone chip. It is not right for collision damage, panel replacement, or anything requiring color matching across multiple panels. The reason is equipment and environment, not effort.
What a mobile setup can and can't replicate
A fixed shop has three things a van typically doesn't: a downdraft spray booth with filtered air, a controlled bake cycle, and consistent lighting for color matching. Those aren't luxuries, they're what make a finish cure evenly and match under any light.
- Booth vs. open air, spraying outdoors or in a garage exposes wet paint to dust, pollen, and insects. A single dust nib means sanding and polishing the whole panel.
- Bake cycle vs. ambient cure, a booth cures paint at elevated temperature for a set time, which drives cross-linking. Ambient cure depends on weather; a cool, humid day can leave the coating soft for days.
- Color matching, metallic and pearlescent finishes shift with angle. A shop can spray test cards and check them in natural light before committing. A mobile tech working in a driveway often can't.
None of this means mobile work is always bad. For a small chip or scuff on a single panel, a skilled mobile tech with a portable airbrush and matched touch-up formula can produce a result you'd have to hunt for. The trade-off is scale: the larger the repair, the more the missing booth and bake cycle show.
Worth it vs. not worth it
- Worth it: minor scratches, small dents, single-panel touch-ups, lease-return cosmetic fixes, chips smaller than a coin.
- Not worth it: structural damage, multiple panels needing blend, peeling or delamination, anything under warranty from a prior repair, or any defect where the substrate itself is compromised.
How to document a defect for a refund or warranty claim
This is the step most owners skip, and it decides whether a claim succeeds. Before you call the shop, build a record:
- Photograph the defect in raking light. Hold a bright light parallel to the panel and shoot from a low angle. Straight-on flash washes out runs, orange peel, and delamination edges.
- Capture the whole panel, then a close-up. The wide shot shows location and extent; the close-up shows the defect itself.
- Note the date and mileage at the time of inspection, and compare against the repair invoice date.
- Keep the written estimate, invoice, and any warranty card. These establish the scope of work and the warranty terms.
- Get a second opinion in writing from another shop if the original refuses to inspect. A one-page assessment noting the defect and probable cause carries weight.
- Send a written demand (email is fine) describing the defect, the date, and what you're asking for, repair, refund, or respray. Keep a copy.
If the shop still won't act, your state attorney general's office and consumer protection division are the next stop. Many states also license auto body shops through a state board, and a complaint there can trigger an inspection. The paper trail from steps 1-6 is what makes any of those routes work.
Frequently Asked Questions
How can you tell if a paint job is bad?
Run your hand over the surface. A quality finish feels as smooth as glass. If you feel bumps, grit, or a wavy texture, that signals surface preparation issues or contaminants trapped under the topcoat. Next, check the paint in direct sunlight from multiple angles. Look for color mismatch between panels, overspray on trim, and visible brush strokes or roller marks. These are the most common signs of poor quality paint jobs.
Does orange peel indicate a bad paint job?
Not always. A light orange peel texture can be normal on factory finishes. However, heavy orange peel that looks like the skin of an actual orange usually means the paint was applied with incorrect viscosity, wrong spray pressure, or too much distance between the gun and the panel. If you want to know how to fix orange peel on car paint, a professional can wet-sand and polish the clear coat to level the texture without a full repaint.
Can a poor paint job be fixed without a full repaint?
In many cases, yes. Minor issues like overspray, light orange peel, or small runs can be corrected by sanding and polishing the affected area. Blistering, peeling, or delamination usually require stripping the panel back to the substrate and repainting. A shop with experience in paint correction can assess whether spot repair or a full respray is the right call.
How long does a professional paint job last?
A properly applied paint job using quality materials and correct curing time typically lasts many years with regular care. How long a professional paint job lasts depends on material quality, surface preparation, environmental exposure, and whether you wax and wash the vehicle regularly. Poor prep or cheap materials can cause fading, chalking, or peeling within a year or two.
Paint defects rarely improve on their own. Every run, blister, or mismatched panel gets worse with sun exposure and weather, and the correction cost climbs with it.
At Rubio's Custom Repair inc, we've spent over 30 years restoring vehicles with original parts and premium PPG products, and every repair is backed by our guarantee. If you're dealing with a failing paint job or collision damage, schedule an appointment and get back on the road in no time.